Scheduled invites let you send your review requests to a list of clients at once. Here are the steps to prepare and send a scheduled review request task:
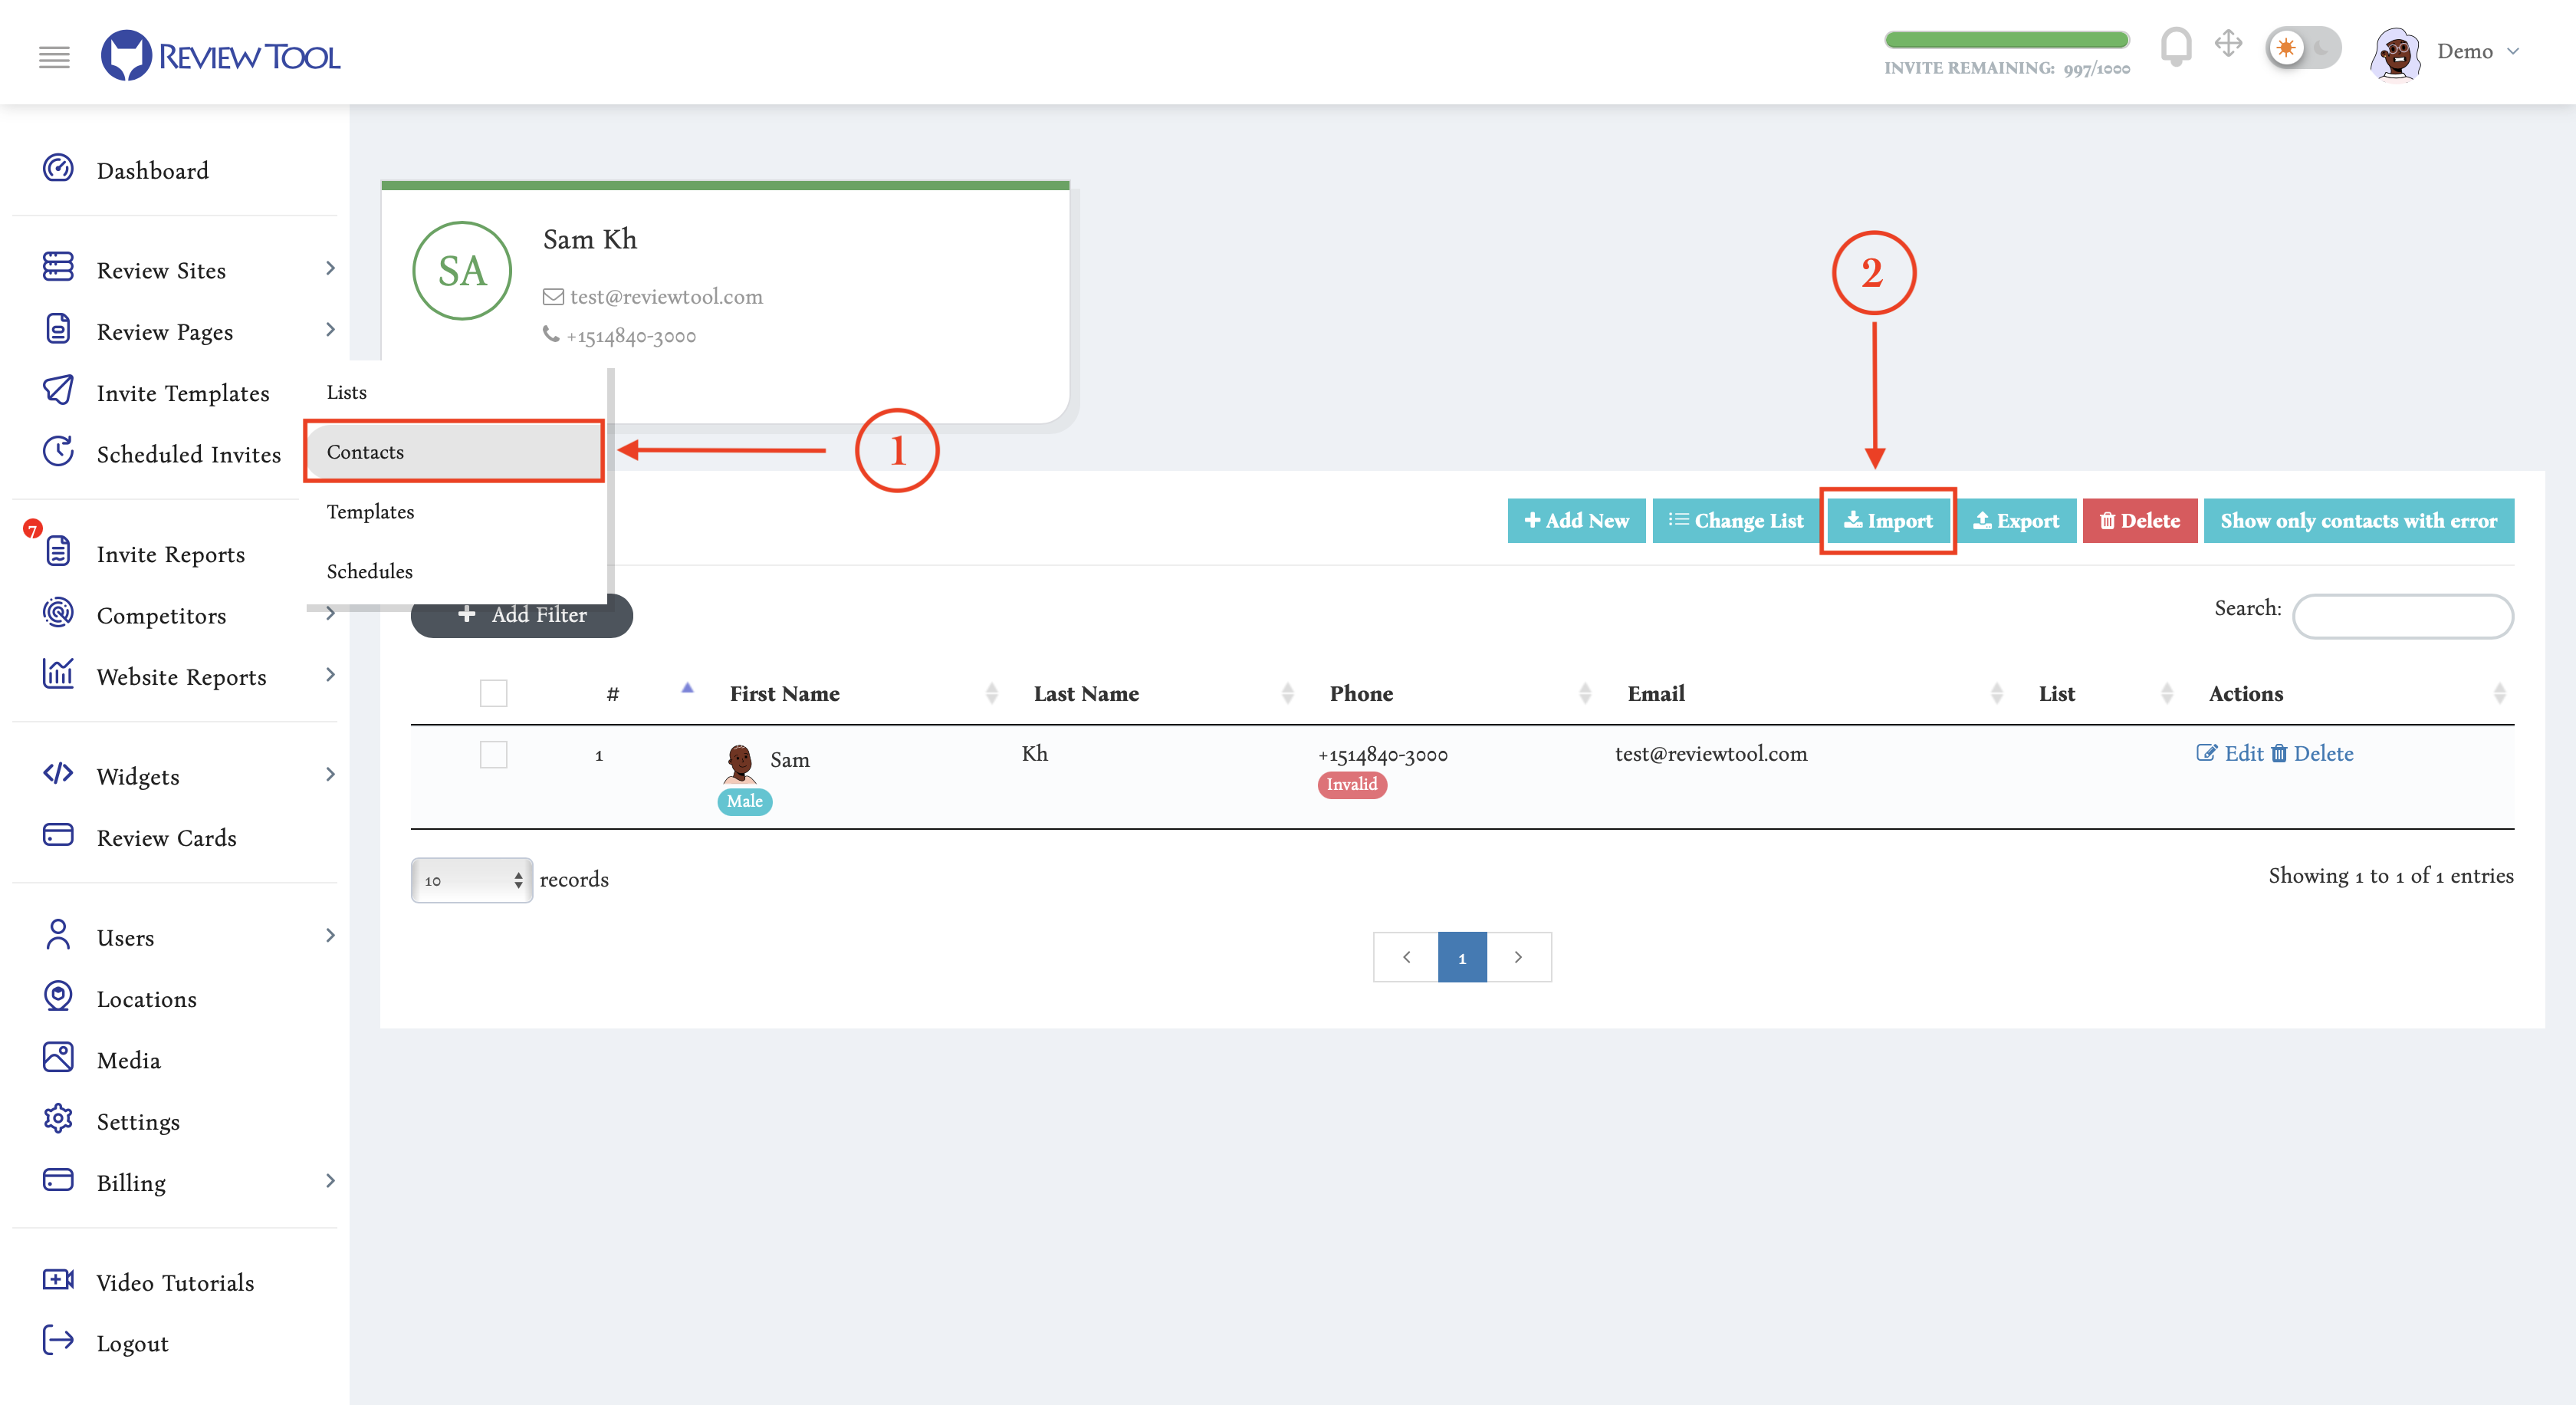
1. You first need to import your customers’ list. For this, you can navigate to the “Contacts” page (1) under the “Scheduled Invites” tab and from there, click on the “Import” button (2).
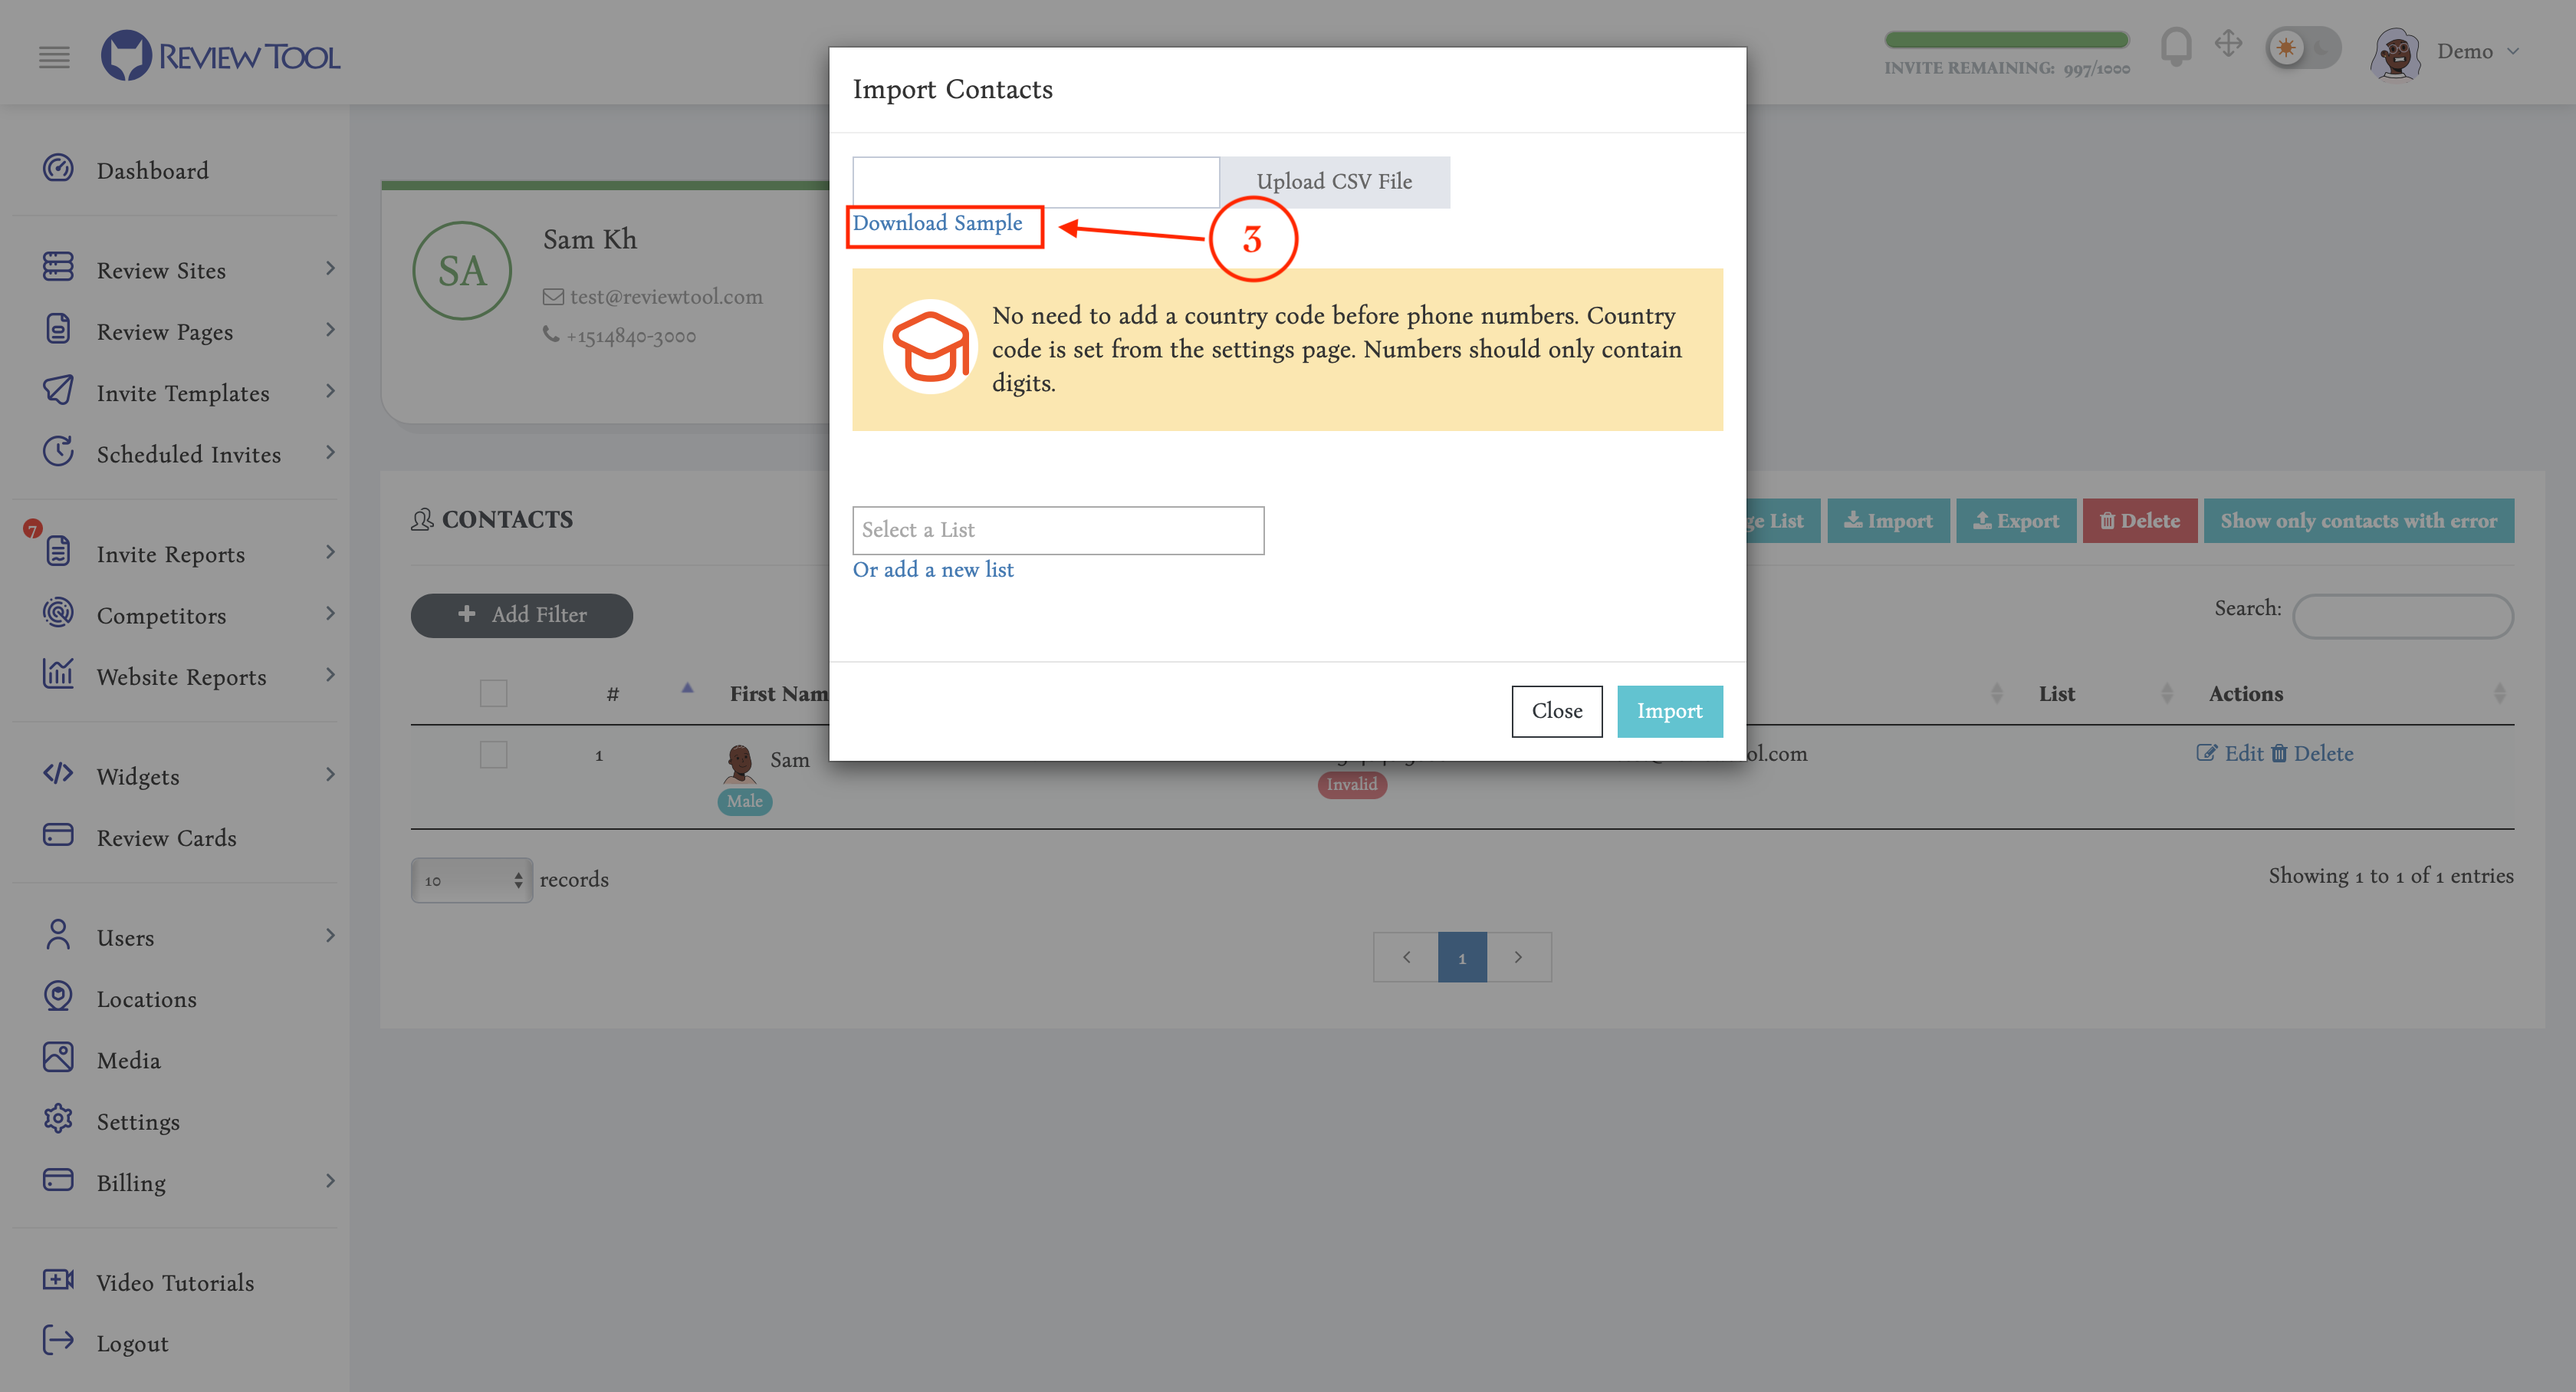
You will then need to click to “Download Sample” link to download a Sample CSV file (3) that you can fill out with your customers’ info as shown in the image below.
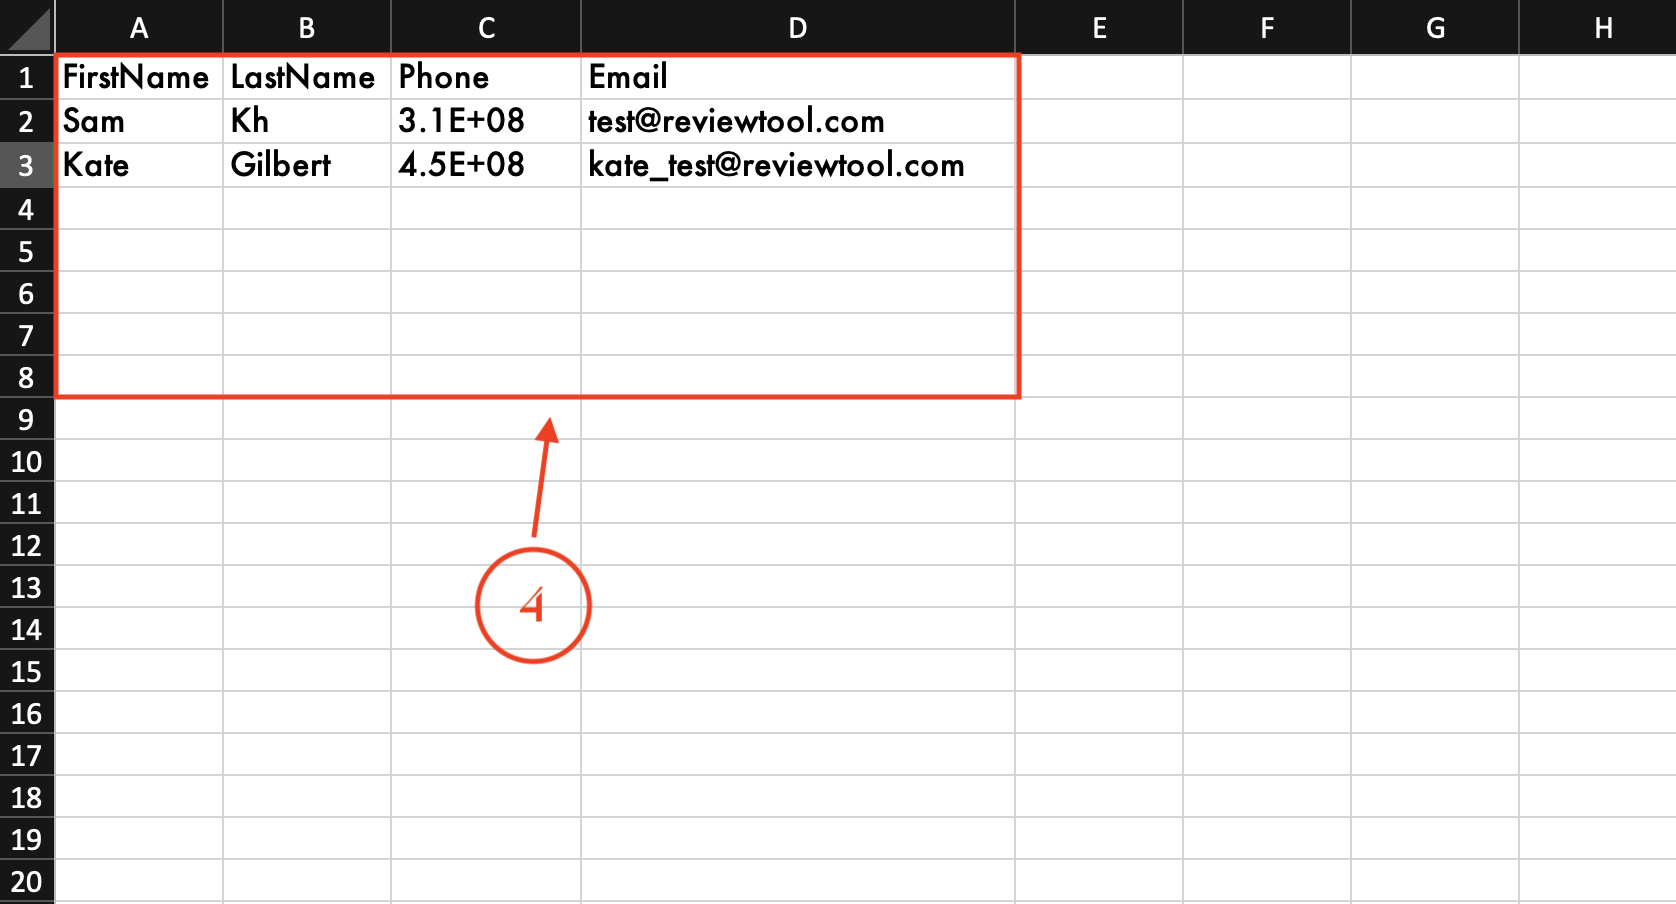
Then fill out the CSV file with your customers’ information just by following the type of info that you need to add to each column of the sample file (4).
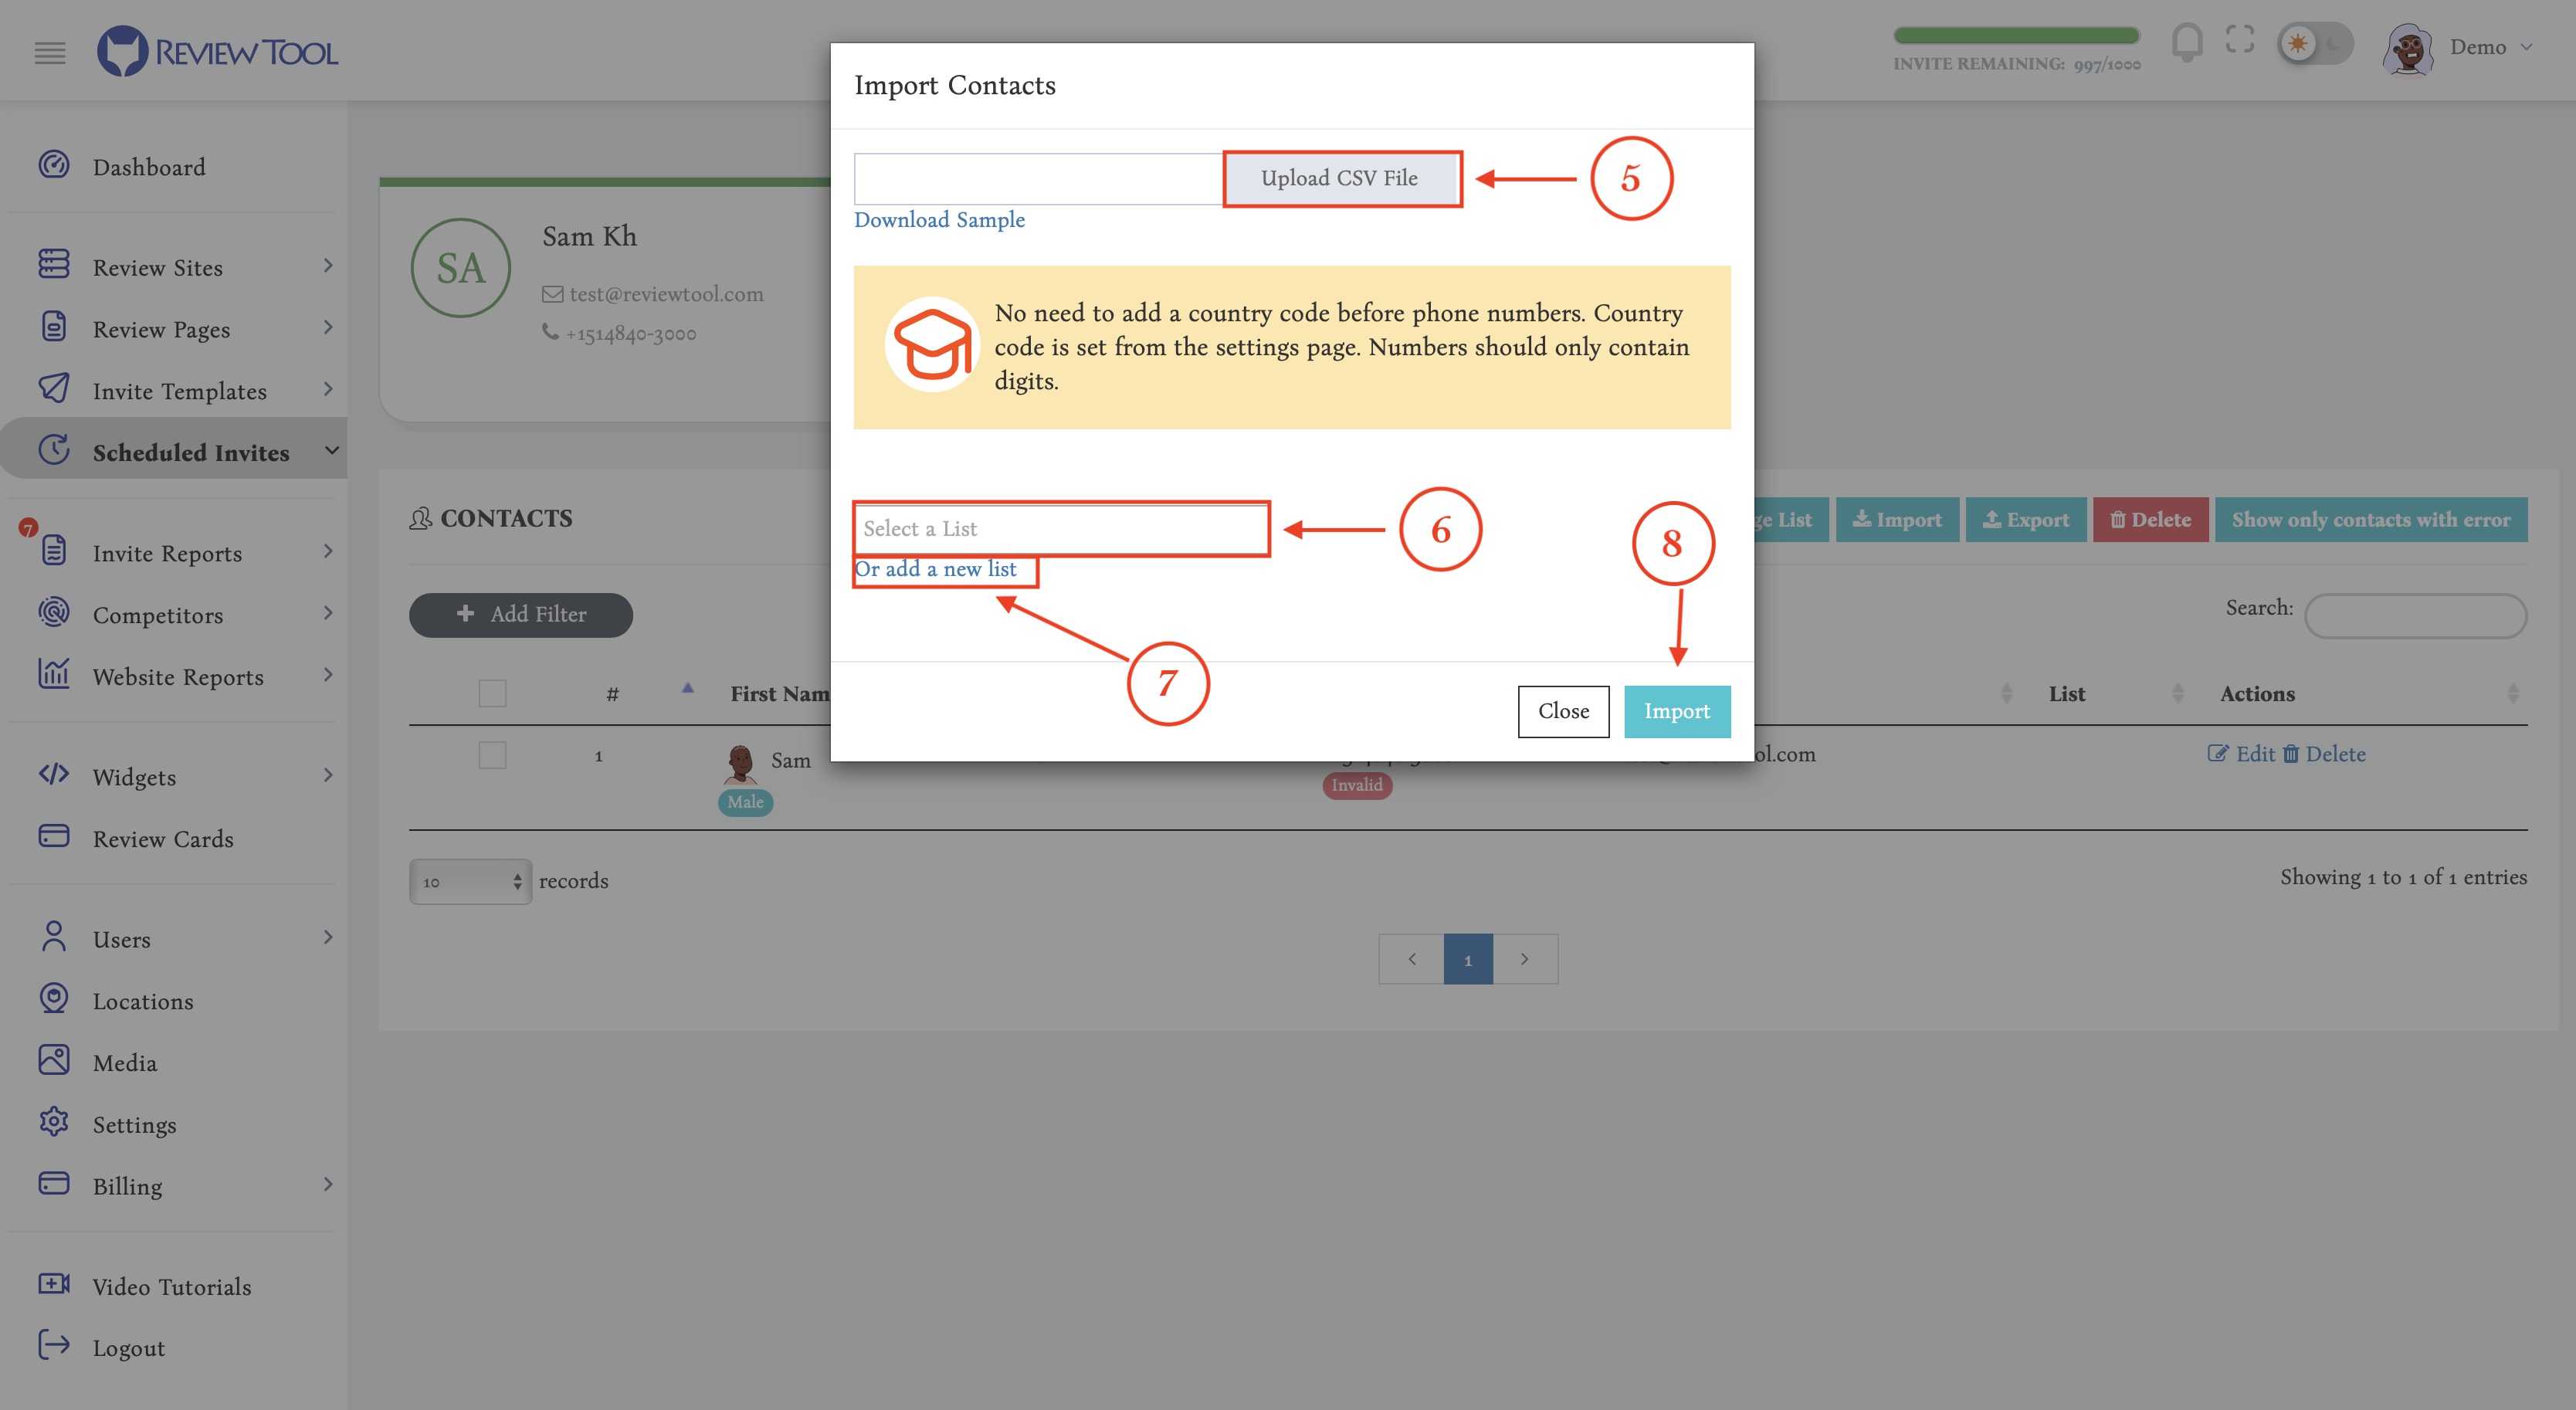
After that, you need to upload your customers (5) and assign them to a list (6). If you have created a list before, you can select it from the list dropdown field (6), or you can choose to assign your contacts to a new list by clicking on the “Or add a new list” link (7) and then by filling out the new list’s name field that shows up. After that, you just need to click on import contacts (8).
2. After importing your contacts, you would need to add a scheduled task. In order to do this, you need to follow these steps:
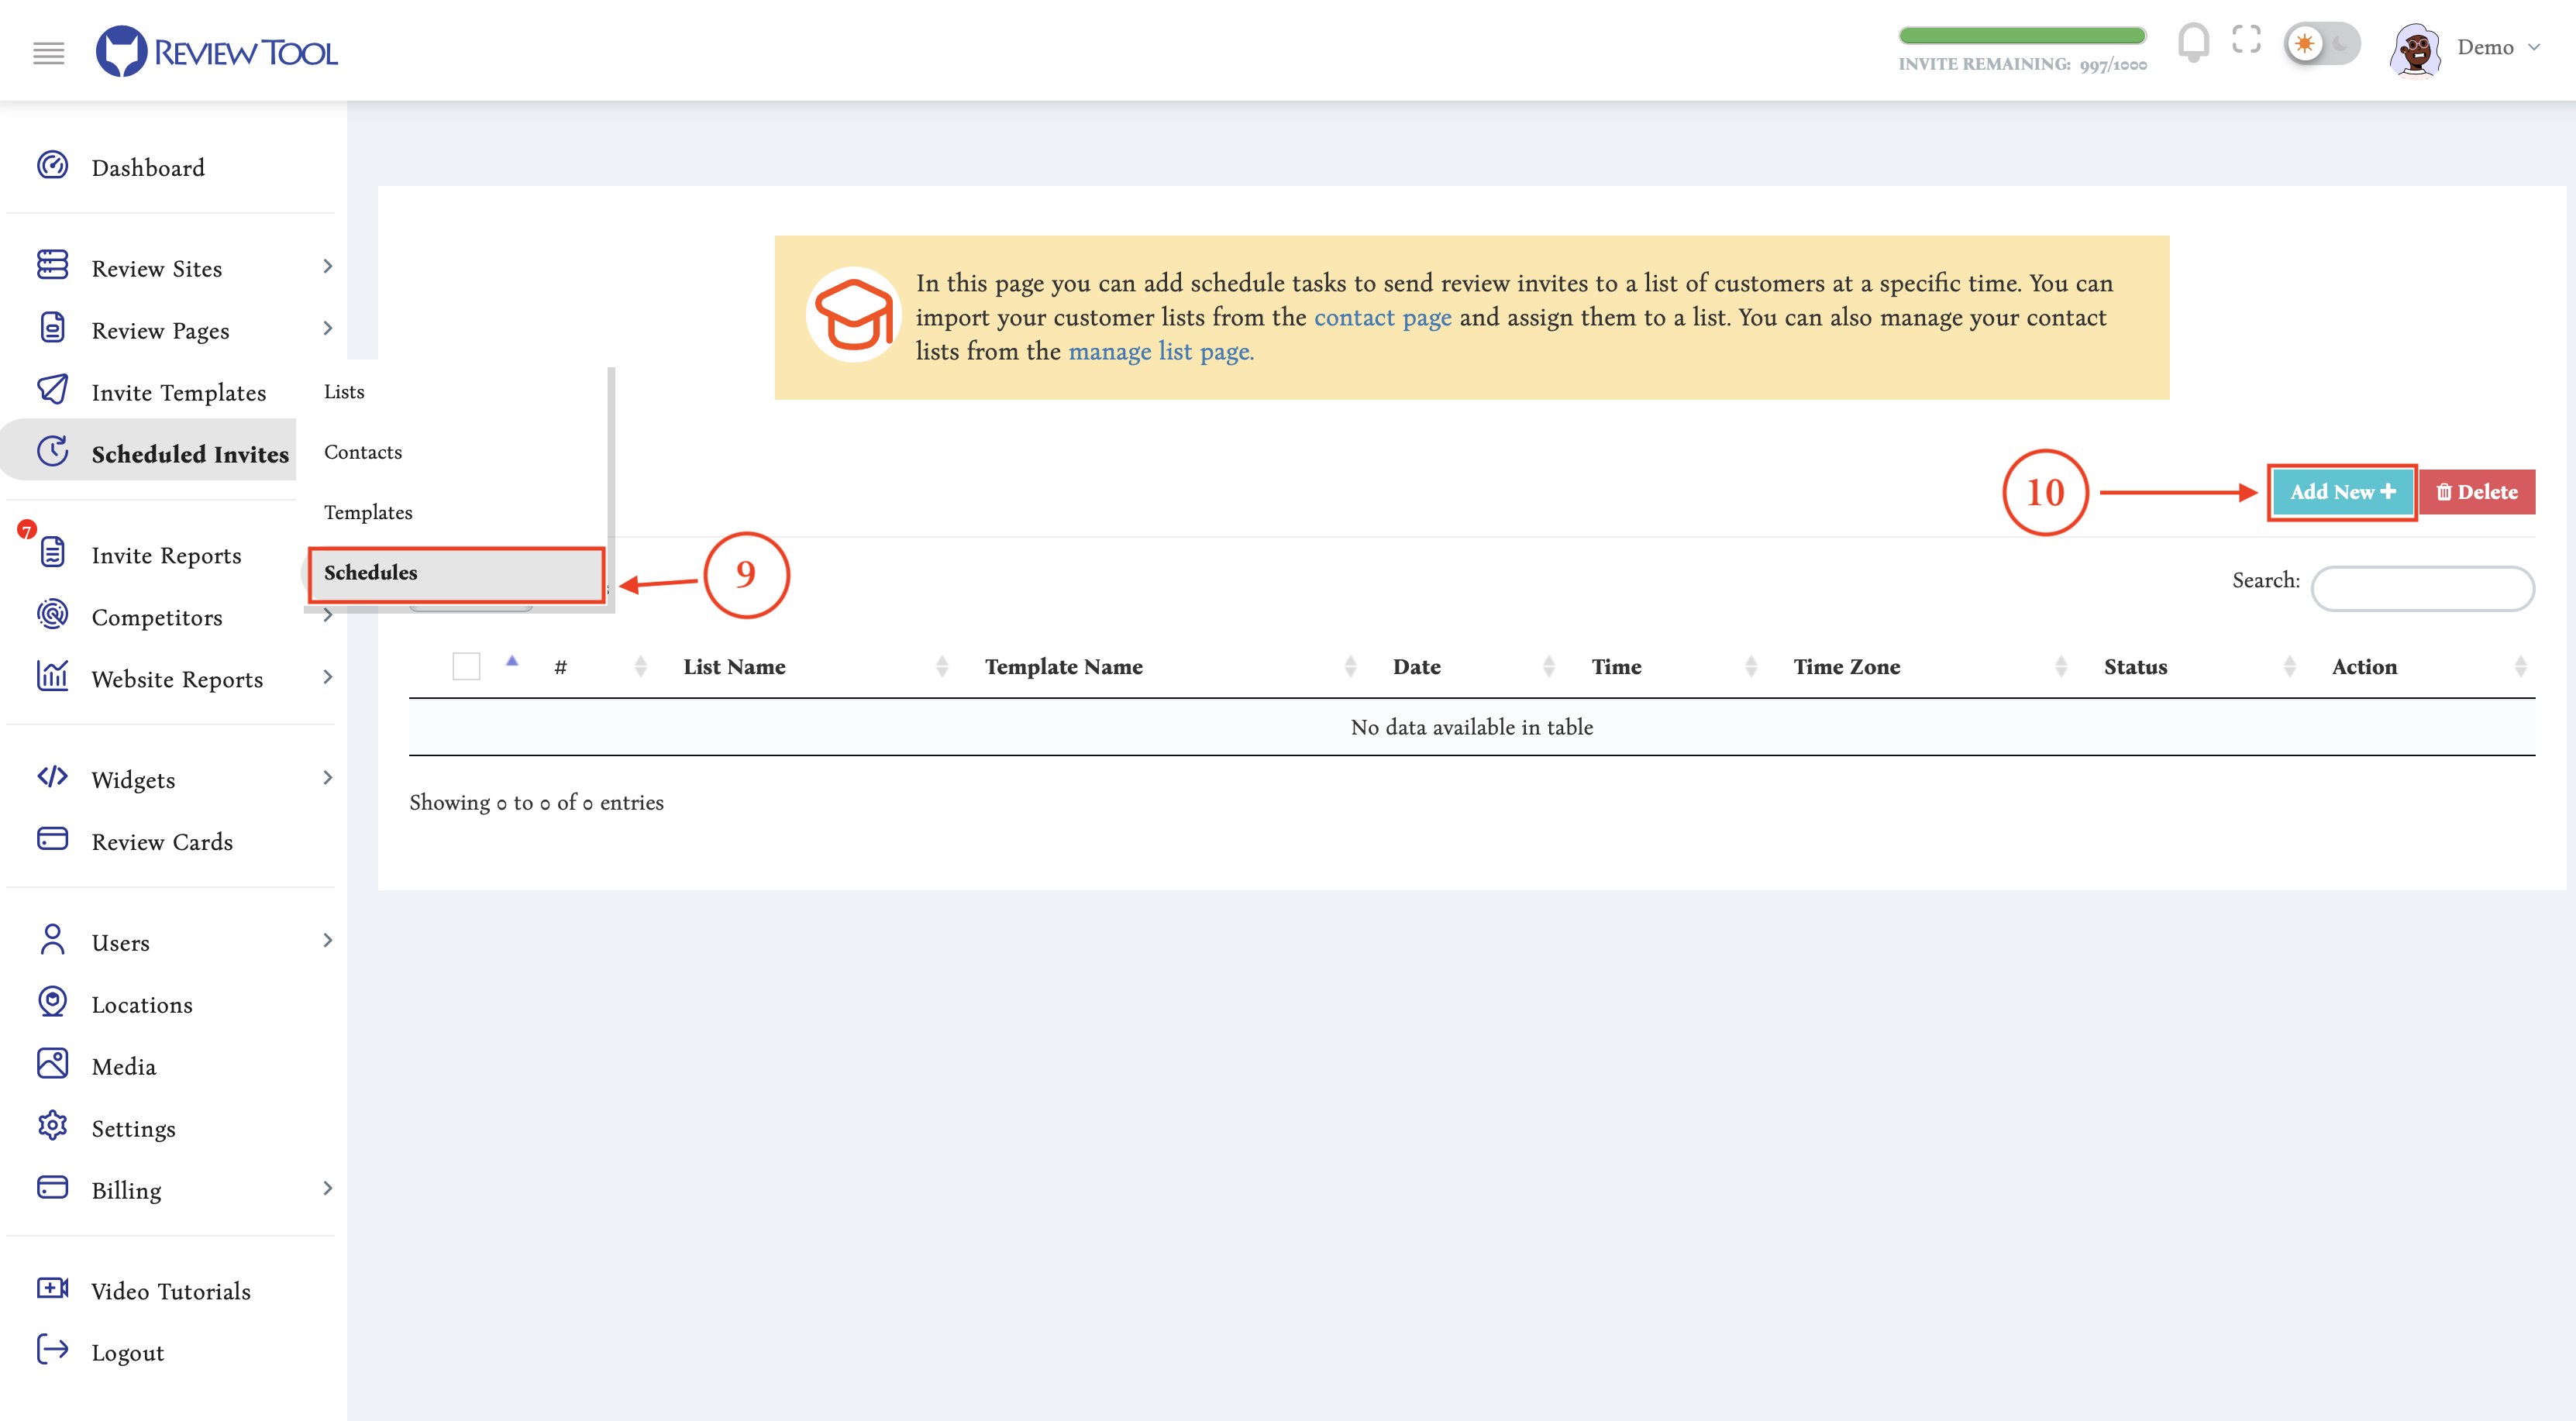
- Click on “Schedules” (9) from under the “Scheduled Invites” and then click on the “Add New” button (10).
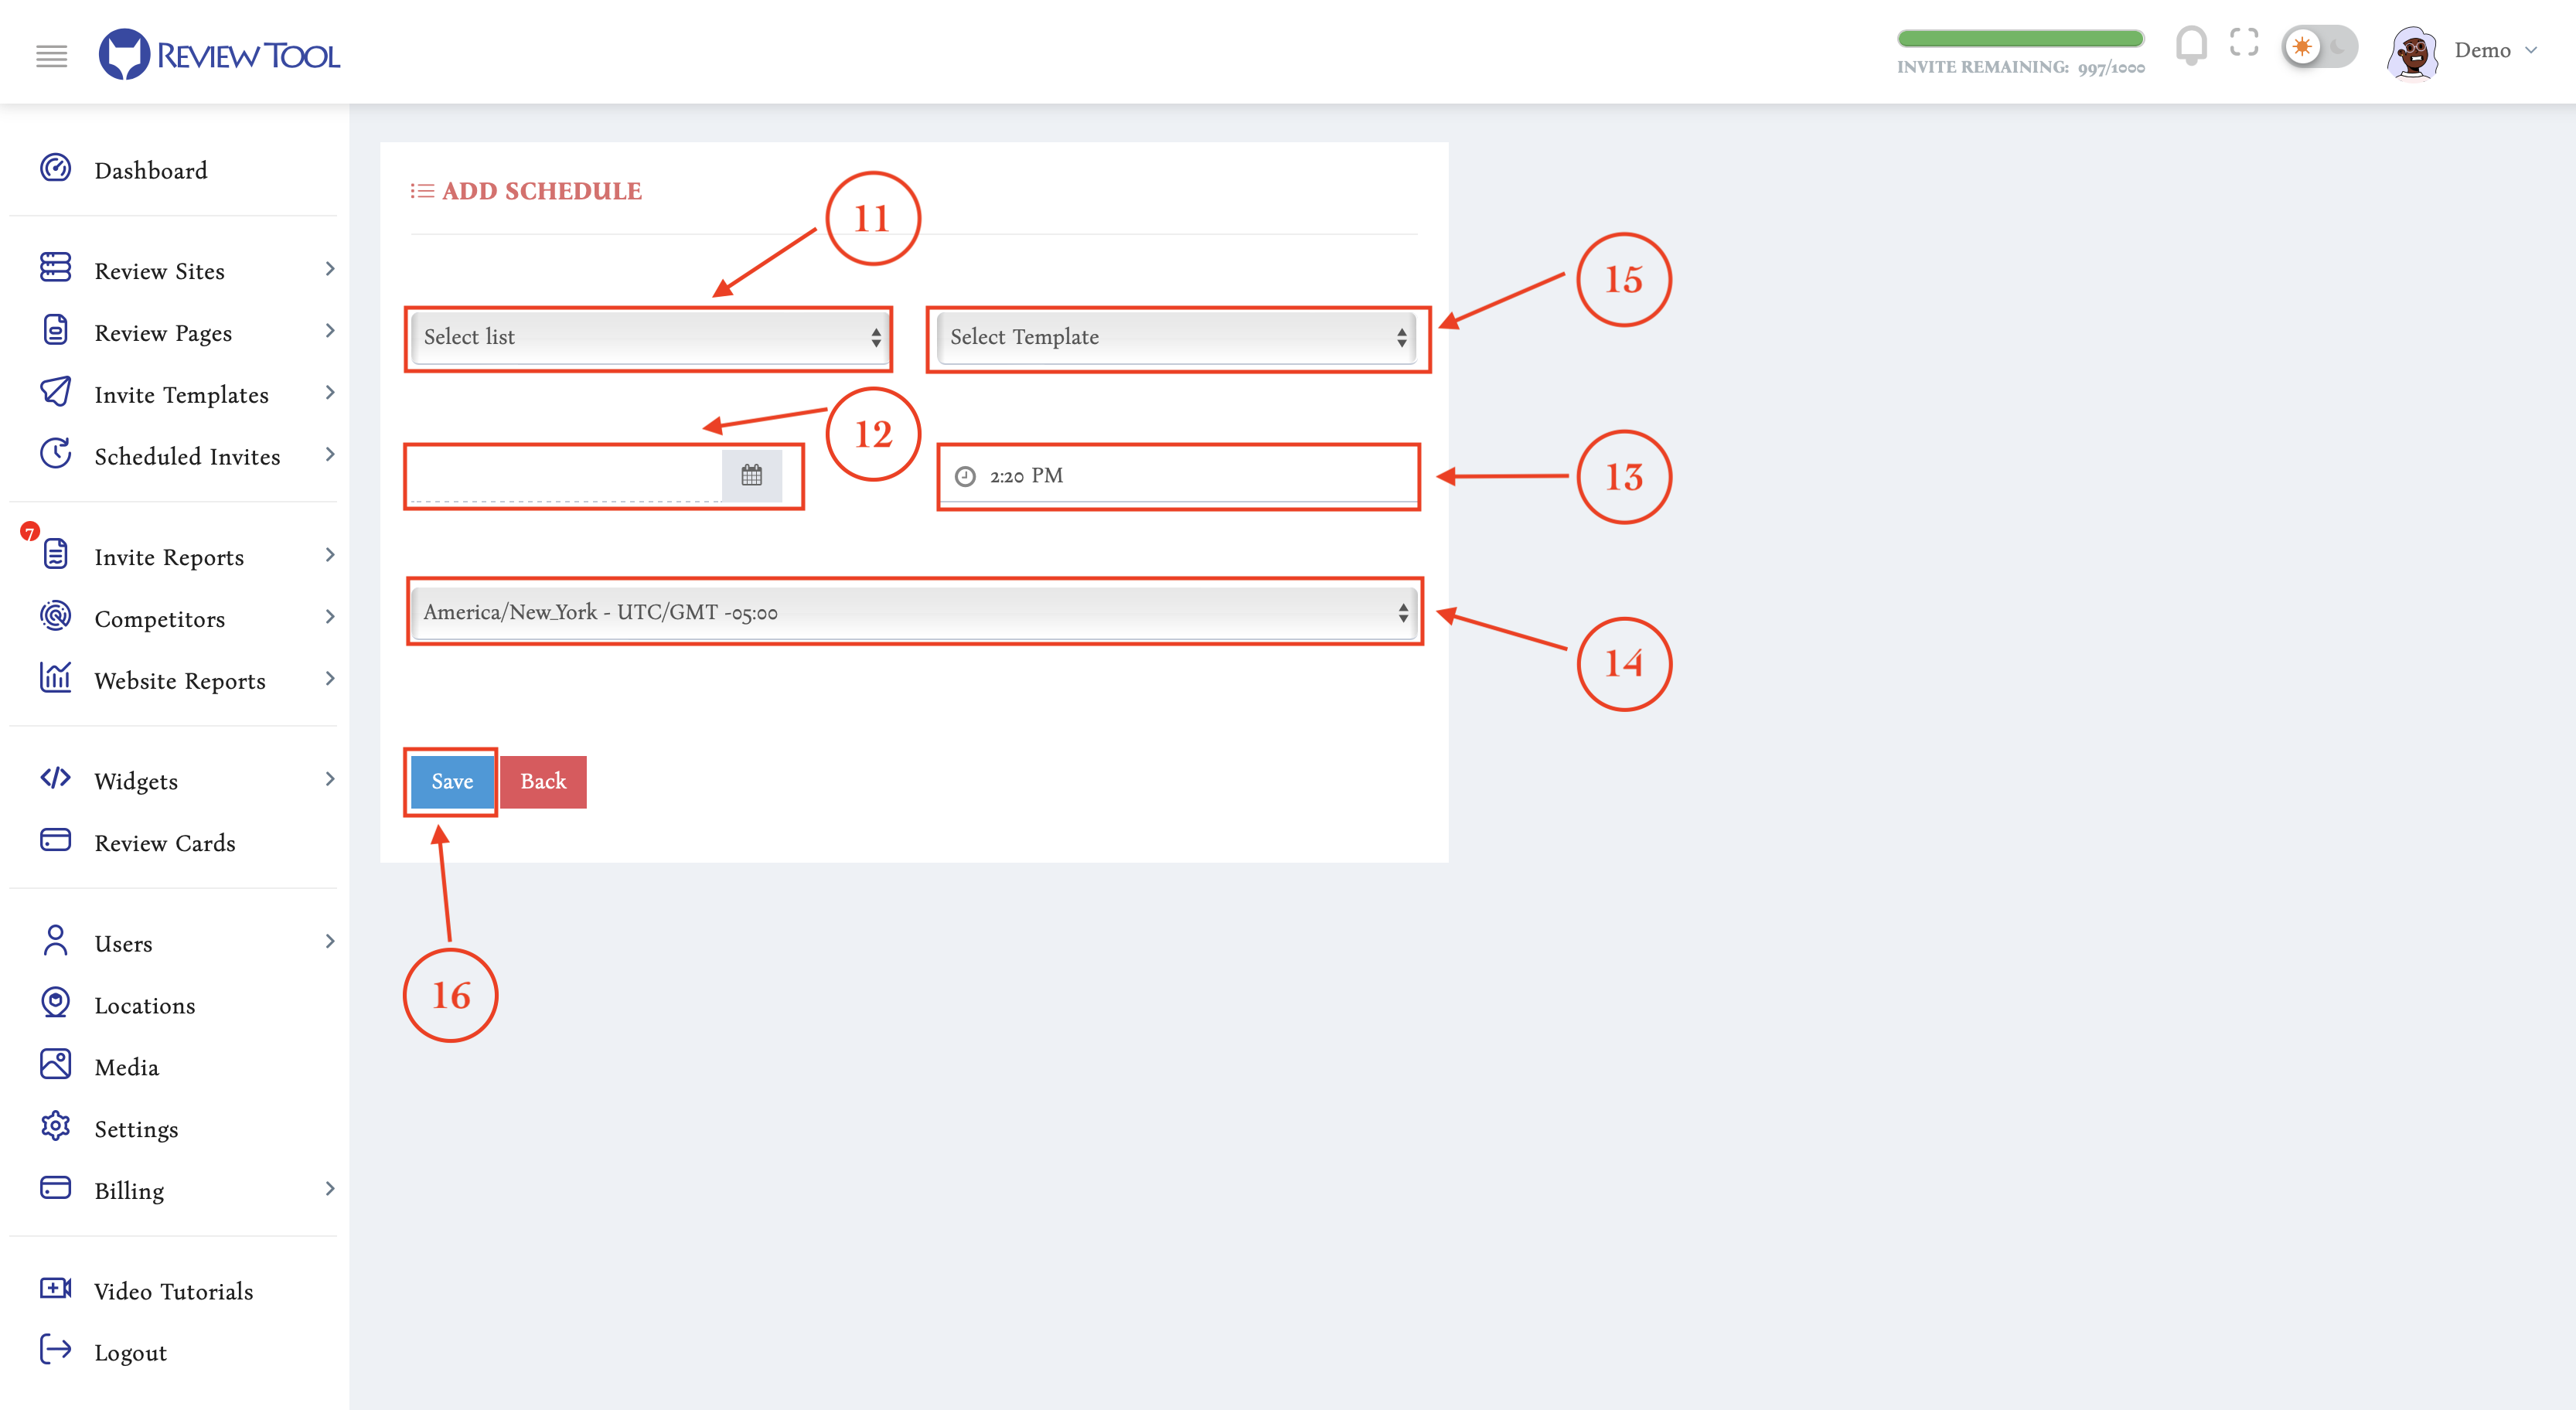
- Select a contact list (11), this is the list that you assigned to the contacts you imported in the previous step or any previous list that you might have from the past to which you want to send your review requests now.
- Select the date (12), time (13), and time zone (14) you want your scheduled invite to be sent based on.
- Select a template (15). You can use any template you have added in the past or use the ones automatically generated for your account at the time of signing up.
- Please note that the scheduled invite templates differ from the single invite templates. You can see the list of all your templates from your “Templates” tab.
- Click on the “add” button (16) to add your scheduled invite.
Review Tool will try to send your scheduled invite on the exact date and time you set for it. After sending, Review Tool will notify you about the results by letting you know how many contacts were successfully sent a review request and how many of them have failed. You can see this notification on the top right side of your account under the notifications center.